Showing posts with label spring. Show all posts

Thursday, April 12, 2012

Easter Egg Cupcakes

So in this post I am actually combing two pins to share. I love mandarin cake, so decided to try this cake recipe and make cupcakes with it.
The original recipe can be found here.

Mandarin Magic Cake

Yield: 24 servings.
1 (18 oz.) yellow cake mix
4 eggs
1/2 cup oil
1 (11 ounce) can mandarin oranges and juice
1 (20 ounce) can crushed pineapple
1 small box instant vanilla pudding mix
9 oz. Cool Whip
Preheat oven to 350 degrees. Mix together cake mix, eggs, oil, and mandarin oranges and juice; pour into a 9 by 13 inch greased and floured pan. Bake for 30 minutes or until done. Mix the whole can of pineapple along with the juices with pudding powder and Cool Whip. Spread over the cooled cake. Keep this cake refrigerated.

Now I skipped the frosting, because we are making these for an easter egg hunt and they must be kept refrigerated, but I have tried this frosting and it is delicious!!

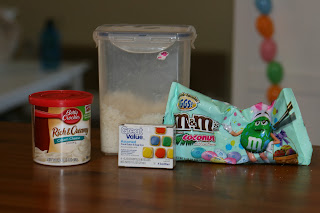
 Ingredients for the cupcakes


 Ingredients for the frosting, I think mixed green food coloring to the coconut then we stuck it onto the frosted cupcakes, then added M&M eggs. It was fun to do with the kids!

They were perfect to take to the Karate school easter egg hunt potluck!

This is the link for the idea for the cupcakes.


Friday, April 6, 2012

Fun Fur Spring Wreath


The beautiful fun fur Spring time wreath! I saw this over and over and over again before I finally decided I needed to do this! The original post was all in another language but here is the link. I bought the wreath and 2 full rolls of fun fur. I was a little disappointed that my local craft store did not have any plain green fun fur but this turned out even more eye catching with the spring color stripes. This wreath turned out awesome, but I need to warn that it takes a very long time to wrap. When I finished up two full rolls and at least 90 minutes later, the fun fur covered about two thirds of the styrofoam wreath! Quick thinking led me to taking some ribbon I already had laying around and alternating pink and purple around the remaining part of the showing green styrofoam.


I had also bought some artificial daisy flowers and some clusters of fake eggs to put around the wreath. Here is what the flowers looked like.


Note, there is wire on the back so you can easily wrap around the wreath. The fun fur does a good job hiding wires.


For the eggs, I just pulled each cluster of 3 apart and stuck the pick into the styrofoam. I do want to also say that I made the cute little flag that is on the original wreath that says, "barefeet welcome". I used a toothpick and wraped a piece of paper around it, cut into a triangle, and wrote the above saying in marker, then wraped scotch tape around it to stick together but also to laminate it. Well, within a month it had faded to this. I suggest using a sharpie if you decide to do this.


Good luck with your wreath! If you decide to do it, it is a lot of work but I think completely worth it! I get tons of compliments when people come over!


Wednesday, April 4, 2012

Peep Wreath

Photobucket


This inspiration comes from Tried and True's blog. When I set out to do this peep wreath, I thought it would be inexpesive and beautiful. I let my 4 year old help out while my little ones napped. She had a good time until she realized she was not going to be allowed to eat the marshmellow goodness. I did let her pick one to eat though, it was blue if you are curious.

Supplies: 3 packages of peeps, toothpicks, and a styrofoam wreath. I used the green wreath as it was cheaper than the white ones, for some reason.
Photobucket


We started by piercing the peep with a toothpick and trying to stick it in the wreath. This was easier said than done. The toothpick was going through the peep instead of the styrofoam! So quick problem solving lead to me sticking the toothpick in the stryrofoam first and me and my 4 year old then placing the peep ontop. This worked much better for us.
Photobucket

When we finished we were left with a mostly filled peep wreath. There were way too many gaps for me though.
Photobucket


I stared at it for a day before raiding my craft bin and found a bag of feathers. Perfect! A few hot glue gun dots and a pencil to help push the feathers where I wanted them, and I was left with a beautiful, compliment worthy wreath! I just tied the ribbon around the wreath in two places, pushing it between the still soft peeps. Mission accomplished!

Photobucket

And for those wondering.....
It has been up for a month and no I have not had an ant invasian with it (knock on wood!)

Photobucket